
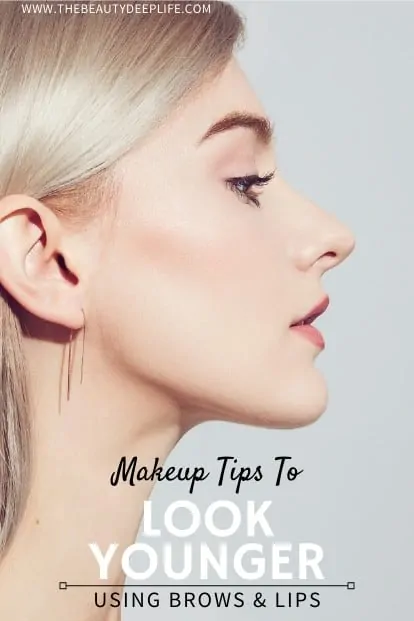
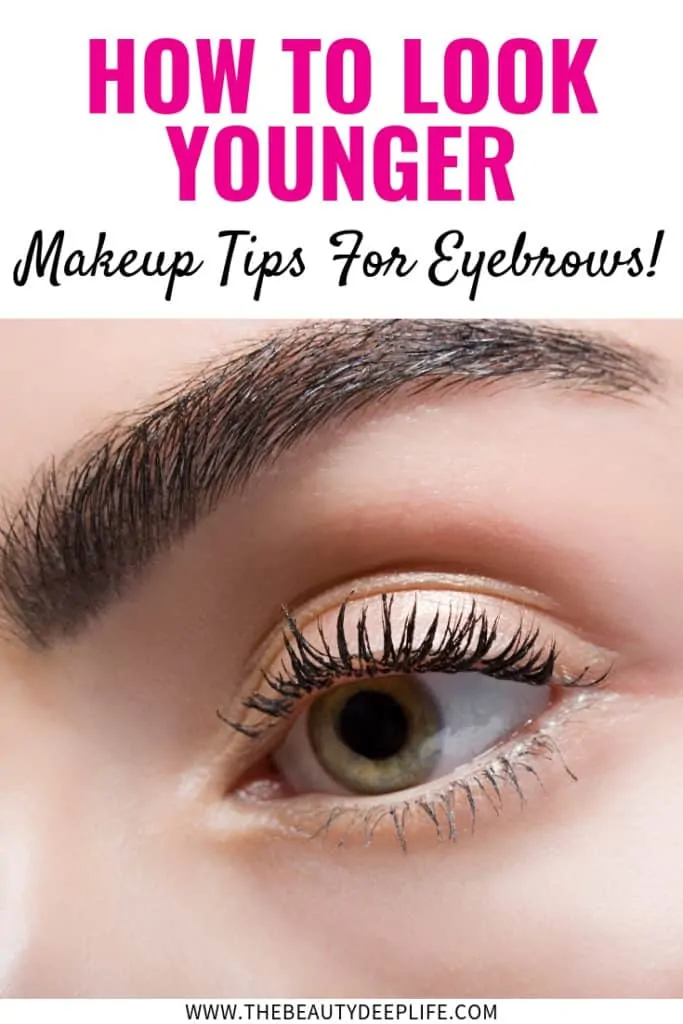
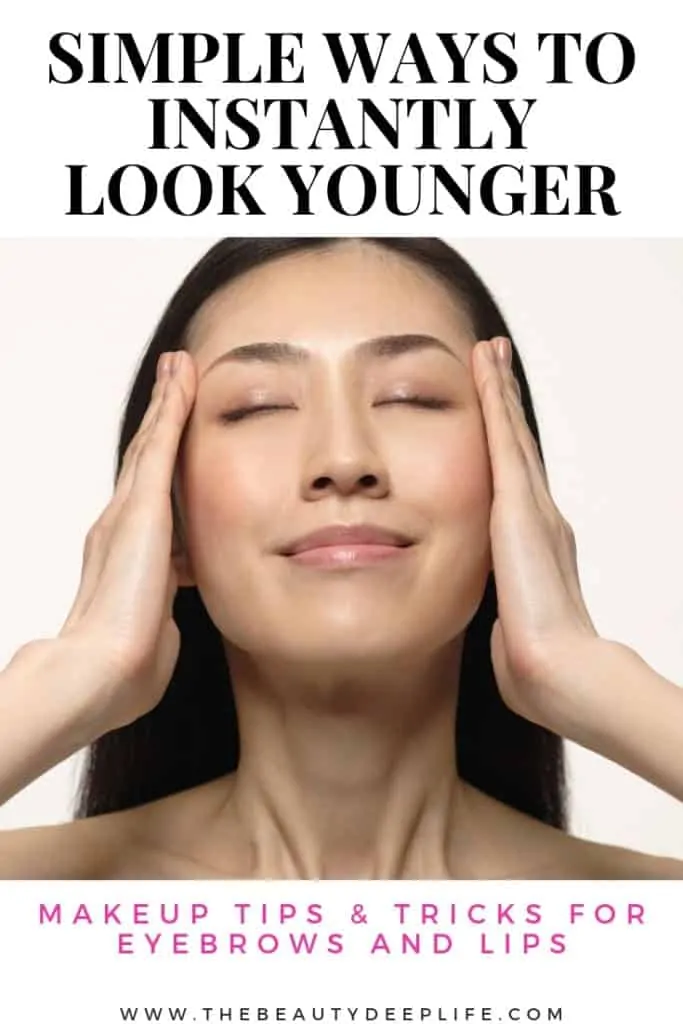
Makeup Tips & Tricks To Look Younger Using Just Your Eyebrows And Lips!
With each decade of our lives, as our skin and faces change, our makeup looks and techniques need some tweaking. In fact, you may have started to notice that your makeup routine isn’t working quite the same as it did in your 20’s, 30’s, 40’s, or 50’s. But rather than getting frustrated, I’d love to share with you some simple makeup tips to help you look like a younger version of yourself again!
As a makeup artist, I learned some tricks of the trade many years ago that can help. All it takes is a few switch-ups, and the differences you see can be quite rewarding!
Disclosure: This post contains affiliate links, which means I receive a small commission, at no extra cost to you, if you make a purchase using one of these links. Please see my disclosure policy for more details. Additionally… As an Amazon Associate, I earn from qualifying purchases.
Why Brows & Lips??
Today I’m just going to focus on eyebrows and lips. I’ll go into more detail on other areas of the face with makeup tips and tricks to look younger in the weeks to come… so stay tuned!
But first, I want to concentrate on these two areas of the face because of a study I read about that used photographs of 700+ women ages 20-80 for examining facial contrast. According to Time Magazine, the study determined that certain facial features, namely lips and eyebrows, can highly influence a woman’s perceived age.
In younger women, these features tend to have more prominence on the face and create more contrast. While in older women, facial contrast in these areas diminishes greatly.
As a result, people subconsciously associate contrast for these particular features with youth. So, ladies, it can be safe to assume that a little enhancement of these features using your makeup can be just the thing you needed to create a more youthful-looking YOU!
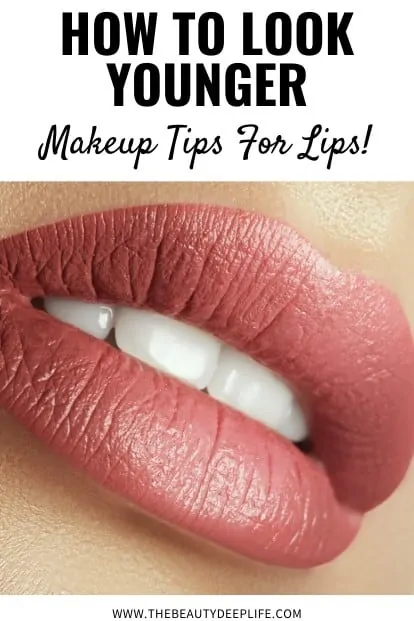
How To Look Younger: Makeup Tips For Lips
You may not realize it, but with every decade of our lives, from our late twenties on, our lips begin to make quite a few changes. Sometimes, it’s due to the environment; other times, it’s simply from lifestyle choices and the passing of time. Most of the time, we don’t even realize the changes are occurring until after the fact.
Unfortunately, these changes begin to show signs of aging, and for some, they can even make you look older than your chronological age. Here are some of the changes that will rather stealthily sneak up on you if you aren’t careful…
- Lips become thinner (this usually is most noticeable by your 40’s or 50’s)
- They lose their definition (begins in your 40’s)
- Lips become paler and lose their natural, youthful color (usually begins in your 30’s)
- They begin to show signs of texture changes and become more prone to moisture loss (usually begins in your 40s)
- Lines start to form on and around them (fine lines begin to develop on them in your 30’s, while lines forming around them, occurs later generally 40’s and 50’s)
The lips can be an often-overlooked area of the face when it comes to turning back the hands of time. But the truth is if makeup is used correctly, you can strategically and quite visibly create a more youthful appearance. It simply involves fixing a few of the mentioned changes that occur.
So, without further ado…let’s delve into some of the makeup tips that will correct those changes and help you look younger instantly, shall we??
Tip 1: Fake A Fuller Pout
Have you ever longed for fuller, younger-looking lips without injections? If your lips have started to become thin over the years, to look younger requires changing their shape just a tad and bringing more balance to them.
To do so, we want to overdraw your lip line a touch, just enough to give a subtle illusion of more plumpness. Check out this next trick below to help!
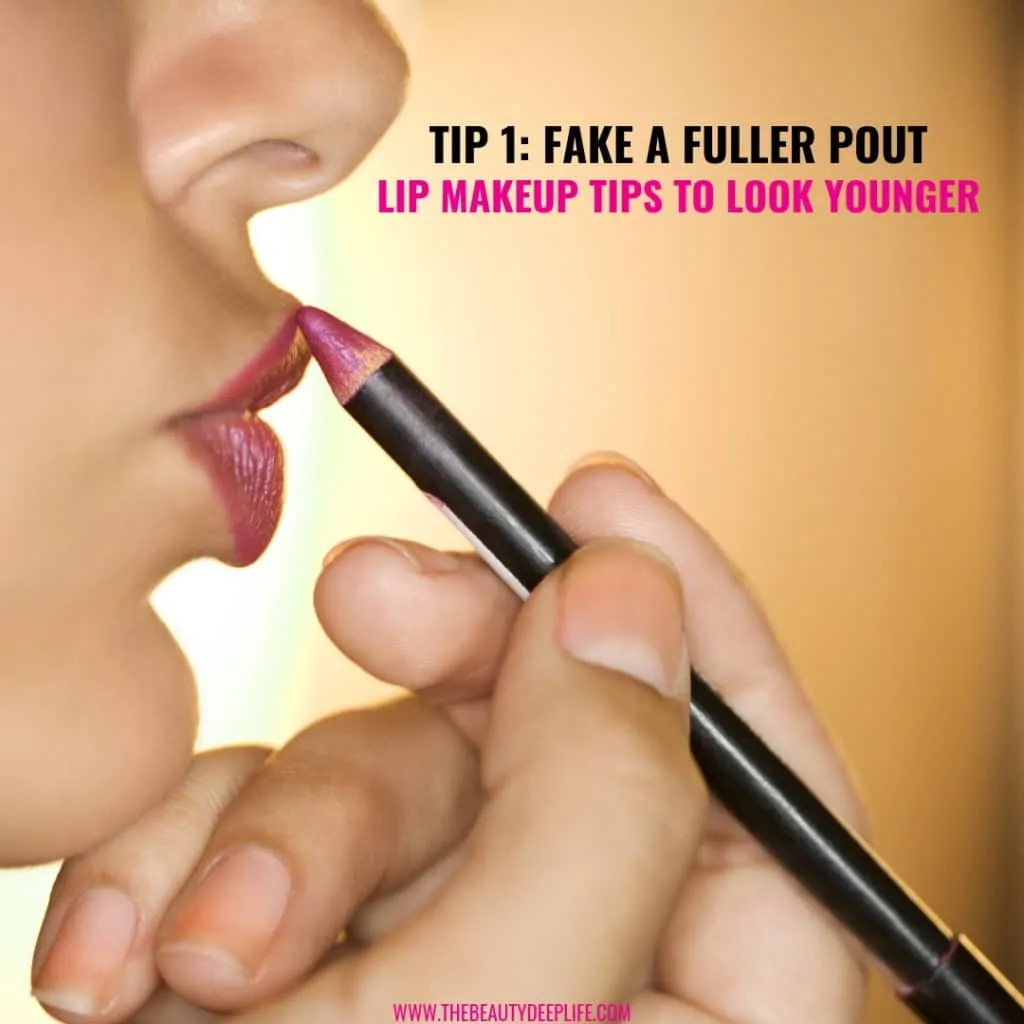
Fuller Lips Trick Using Concealer, Foundation, & Lip Liner
- First, cover your lips with concealer. Fully conceal your entire lips and their natural lip line.
- Next, using a lip liner pencil, draw in a new fuller shape to your lips. You want to trace them a bit outside of your natural lip line and enhance the lip border. My suggestion…practice, practice, practice… as this look can go completely in the wrong direction quickly. Start with the cupid’s bow to define it, then define the full length of the upper lip. Lastly, define the bottom lip. Opt for a neutral lip liner color or one that matches your lipstick color. For some women, you may find you only need to enhance the upper lip if the lower lip has a nice fullness still. If that is the case, for the lower lip, follow the natural lip line with the liner and only trace on the outside of the upper lip’s line.
- Take the liner, and now fill your lips in completely (entire lip).
- Apply your lipstick using a lip brush.
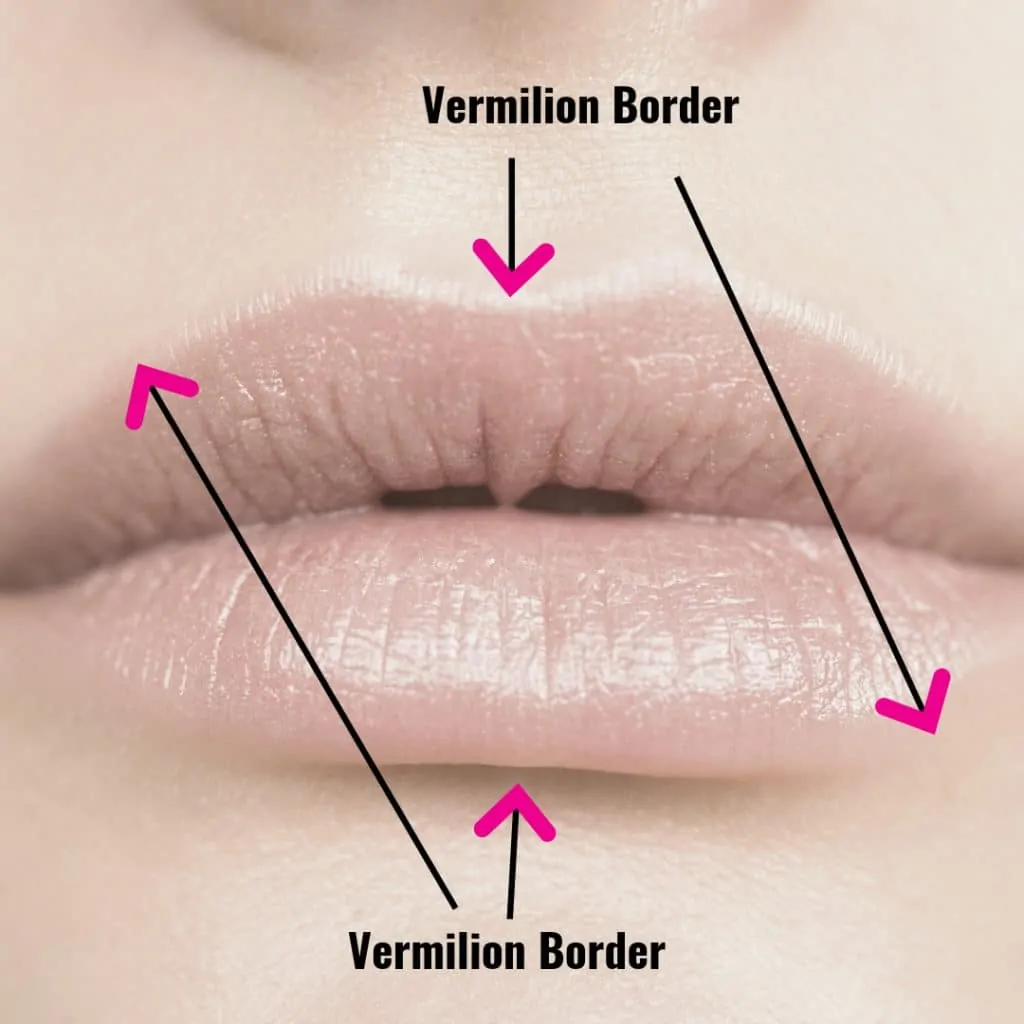
- OPTIONAL – Take a tiny amount of your foundation and mix it with a small amount of your concealer.
- OPTIONAL – Next, using this mixture of concealer and foundation, take a very thin, clean lip brush and paint your vermilion border back in over your newly drawn lip line. The vermilion border is the natural, slightly lighter roll of skin bordering the lips. It’s the demarcation between your lips and the skin next to it. You want to paint in a fake border around the newly drawn lip line. Simply go in with the brush right up against the edge of the drawn-in lip border. This will make the newly drawn lip shape look more realistic and help to create a more defined and perfect lip line. (See photo as a guide)
- Once more, you can go back in with your liner and add a little more definition to the cupid’s bow.
Tip 2: Bring The Plump With Some Gloss!!
If you don’t want to try Tip 1 or aren’t sure about lining your lips, this tip is a great alternative. Lip gloss can instantly give the “illusion” of plumper lips (aka younger-looking lips). The shine picks up light and makes them appear fuller!! Matte lipsticks, on the other hand, can make them look smaller.
So, if your lips have grown rather thin over the years, avoid the mattes and opt for some glosses!! You can also be strategic with gloss placement. If you already have lipstick on, try putting some gloss on your lower lip and then right in the middle of your upper lip.
Hands down, the best lip-plumping gloss is Buxom’s Plumping Lip Polish!! With rave reviews from beauty editors, makeup artists (myself included), and fans alike, it will give you an unbeatable, youthful pout you’ll LOVE!! Using peptides, it boosts thinning lips for a fuller, plumper appearance. Bring on the gloss!! Yes, please!!
PRO Tip: Another way to make lips appear fuller and younger is to highlight them! Take a touch of shimmery highlighter like this one from Becca with your fingertip and lightly apply it right above your cupid’s bow. Champagne Pop is a definite must-have, whether for the lips or full face, as it’s the most universally flattering. It truly gives the shimmer of a goddess!!
Tip 3: Create More Lip Definition
Using a lip liner doesn’t just help with creating a fuller lip; it is ABSOLUTELY necessary for defining the lips too! And since lips can lose definition with age (usually 40’s and on), you may find that it’s time to invest in giving those lips a bit more attention with a pencil.
The key is to create a nice, clean edge fully around the lips without it appearing too hard and unnatural. One way to ensure this is to practice holding the pencil lightly and applying it ever so gently using light, short strokes. Start light in your application and then build from there as needed.
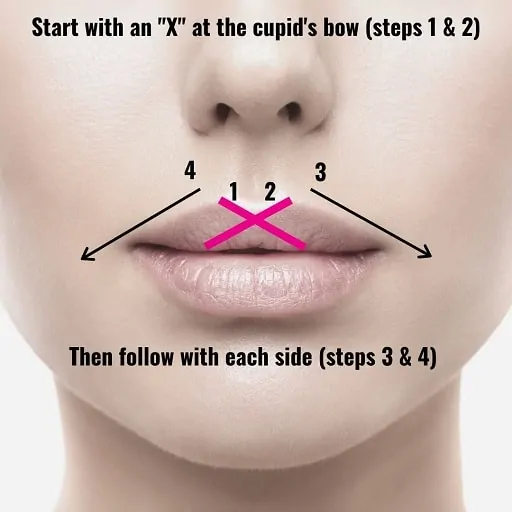
For some women, the cupid’s bow, in particular, can start to lose its definition (especially around their 40’s). So, if you are 40 and over, you want to focus your attention there first. Use that lip liner to emphasize and create a stronger cupid’s bow.
The easiest way to do this is to draw an “X”. Draw a line diagonally from one of your peaks down to the bottom of your top lip. Then switch sides, drawing the next line so it goes through the first one, forming an “X”.
PRO Tip: If you find after using a lip liner that the line appears too hard, you can try using a lip brush to softly blend it out a bit. To do this, focus on blending from the outer edge inward towards the center of the mouth.
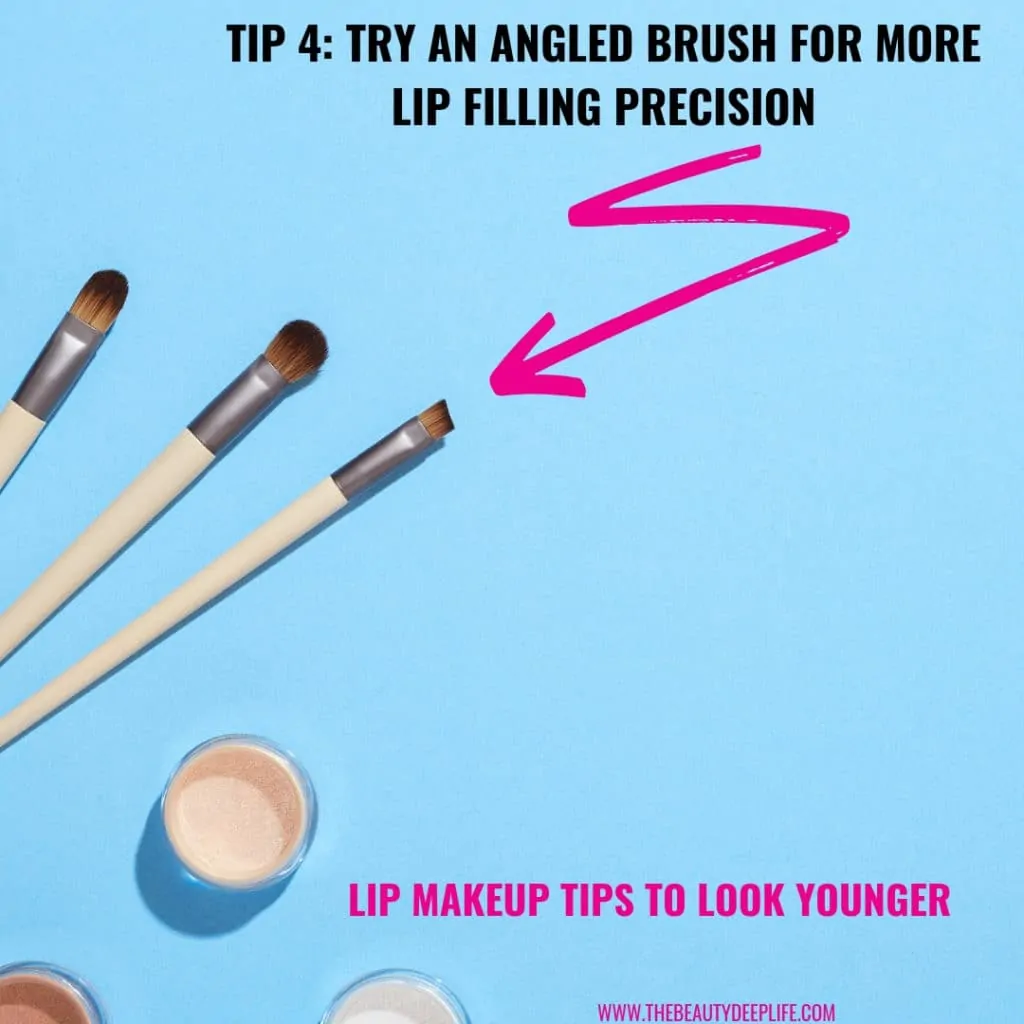
Tip 4: Try An Angled Brush For More Lip Filling Precision
Have you ever tried using an angled brush to fill in your lips?? While most people normally associate angled brushes with eyes and brows, you may find that it gives you more control over the application process than a more traditional rounded lip brush.
Some of the added benefits of this technique are that it allows you to easily get into the corners of your lips and define your lips’ angles (the peaks of your cupid’s bow). You can also create a more precise lip line using this type of brush since the angled tip helps with creating straighter lines.
Of course, it’s not for everyone, but some of you may find you like it better than using a traditional lip brush. Give it a try, and tell us what you think in the comments below!
Tip 5: Enhance Your Natural Lip Color
First, let me say that if your lips have become rather thin, the rule of thumb is you want to steer clear of very dark lipsticks as they will make them appear even smaller. They can also draw attention to fine lines and wrinkles in the lip area if you have them.
But in general, whether they have become thin or not, most women’s lips get paler with age (30’s and on). So, for a more youthful day-to-day look, you want to enhance their natural color and bring a little life back into them. This all boils down to color selection…
Color Selection Makeup Tips: What lip color can make you look younger?
Generally, you should opt for liners and lipsticks in rosy shades… think of your natural lip color plus a touch of rose. You want a subtle pop of color! You can also use a nude for your liner and lipstick; just keep in mind that you don’t want to wash out the lips.
- Fair-skinned women can try rosy pinks and roses.
- For women with olive complexions, you can try roses or peaches with a hint of pink to them.
- For dark skin tones, dark roses and raspberry shades can work well.
If you are seeking a nude shade, check out these liners...from Buxom. I use Hush-Hush and often add a warm, rosy gloss over it to brighten it up a bit.
STEPS FOR APPLICATION:
- First, coat your lips with a little of your foundation as a base.
- Fill them in with liner and lipstick (fill them in completely with the liner, not just the border).
PRO Tip: Ever find a lipstick you like, but it’s just a little too bold or bright for a daytime look? Or maybe you received it as a gift from someone, and now you dread returning it…Try mixing your base (a little bit of your foundation) with it for a more natural look.
- Take a makeup spatula and cut off a tiny bit of the lipstick, then add 1-2 drops (liquid foundation) or a smidge of your base (cream foundation).
- Using the end of your spatula… mash, mix, and blend them together a bit. You can play around with the ratios a little until you reach a shade you like best.
- Then apply with your lip brush!
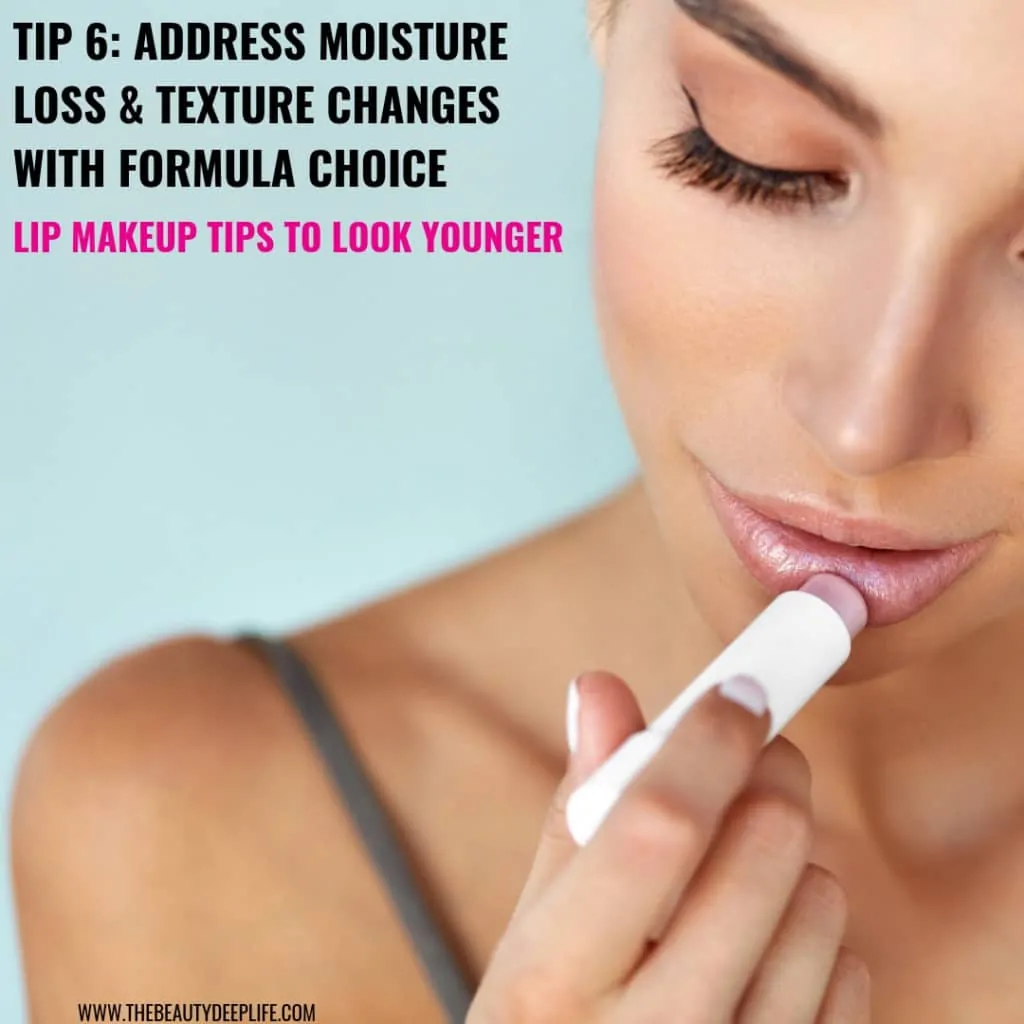
Tip 6: Address Moisture Loss & Texture Changes With Formula Choice
It is incredibly important, no matter your age, to keep your lips moist and protected from the sun. The sun dries them out terribly, and over time, it can do a real number on them as far as giving them an aged look.
All Ages…
Preventative Daily Formula Choice: Opt for a tinted lip balm you can wear daily. You can also look for one that contains shea butter and vitamin E. If it has sunscreen, that’s all the better!!
40’s, & Up (Possibly Some 30-Year-Olds)
Moisture loss and texture changes can begin roughly in your early 40’s for most, but depending on your lifestyle, even as early as your 30’s. For smoother makeup coverage with lipsticks, it’s essential to address those texture changes and the moisture loss in your lips by prepping them and being strategic with your lipstick formula choice.
Prepping Your Lips: If you have dry flakey lips, always exfoliate and moisturize before applying lip products. One exfoliant you can try is a lip scrub like this one from Buxom. It not only exfoliates but it moisturizes and nourishes your lips at the same time.
Strategic Formula Choice: Look for a lipstick formula that is hydrating for your lips and contains ingredients that moisturize, like Urban Decay’s Vice Lipstick. Look for ingredients like aloe vera, vitamin E, shea butter, jojoba, coconut oil, sesame oil, beeswax, etc.
Of course, another option to give the look of more hydration to your lips and thus, a more youthful appearance is to use a lip gloss. In fact, Buxom’s Plumping Lip Polish doesn’t just give the appearance of more hydration, it improves the moisture in your lips with Vitamins A & E.
Tip 7: Handle Pesky Lip Lines & Lipstick Bleeding/Feathering
Often, with age, fine lines begin to form around the lips. As a result, you may notice that whenever you wear lipstick or gloss, you become a victim of the dreaded “bleeding lip” syndrome. When lipsticks and gloss bleed or feather, unfortunately, it makes those lines and wrinkles even more obvious.
So, what should you do?? Well, lip liner is an absolute must!! It keeps everything locked in with staying power.
- First, make sure your lips are moisturized…A lip balm should do!!
- Next, apply your foundation completely over your lips. This is to help fill in any crevices from lines.
- Third, apply your lip liner (to create a barrier for your lips). Outline the lip border! Make sure, when picking colors, that your liner and lip color match. Pro Tip: You can also opt for a clear lip liner like this one from Urban Decay (ozone).
- Fourth, I suggest filling in the entire lip with the lip liner.
- Fifth, apply your lipstick. Be sure to use a brush and be careful not to go outside the area where you applied your liner.
- Next, be sure to blot with a tissue, as this helps with bleeding as well. You want to blot and then apply again. This way, you minimize oils but emphasize the pigment of the lipstick.
- Lastly, take a very small brush or a q-tip and gently apply a translucent powder right outside of the lip line. If you use a brush gently apply by patting. If you use a q-tip, apply by gently rolling outside the border.
How To Look Younger: Makeup Tips For Eyebrows
Eyebrows can seriously make or break a makeup look. You can do a flawless, full-face makeup, but with brows “gone wrong”, the whole thing goes down the drain!
Not only that, they can have a significant impact on the face by creating a more lifted appearance. Ultimately, the perfect brow can help you take years off! A nice arch and definition can act like a brow lift or Botox but without the costly procedure.
Additionally, fuller, thicker brows are subconsciously associated with youth. Though sadly, as we age, our brows can become thinner, and similar to our eyes, the skin in the brow area can start to sag a touch.
Therefore, our next goal overall is to focus on the definition, arch, fullness, technique, and color of your brows. Check out these next makeup tips to help you look younger with just a little bit of brow work and some simple changes!
Tip 1: Give Your Brows Some Definition
With age, while some women notice brow thinning, they may also see random strays popping up outside the ideal browline. For example, the temple area, above the brow, or under the brow. Whatever the case, if it’s too far from the brow to be considered a legitimate brow hair, it needs to go!
For a more defined brow, you need to focus on a nice clean shape. Doing so will open up your eye area and make everything appear more lifted. Trim brows and tweeze any obvious strays, but do not over-pluck!
This may require getting them professionally done at first and then working to keep them up yourself. Use the shape they give you as a guideline in the weeks following. From that point on, only pluck stray hairs that begin to grow in and appear outside of that shape.
While most women notice brow thinning, some women may suffer from the opposite problem: bushy brows. However, don’t confuse bushy brows with full and youthful; they still require shaping.
If brows are too bushy, they can make the eyes appear smaller, which can visibly age you. So, focus on keeping some girth while getting them shaped and cleaned up properly. If you are unsure, get them done professionally first and then keep them up from there. For more brow grooming tips, check out this post.
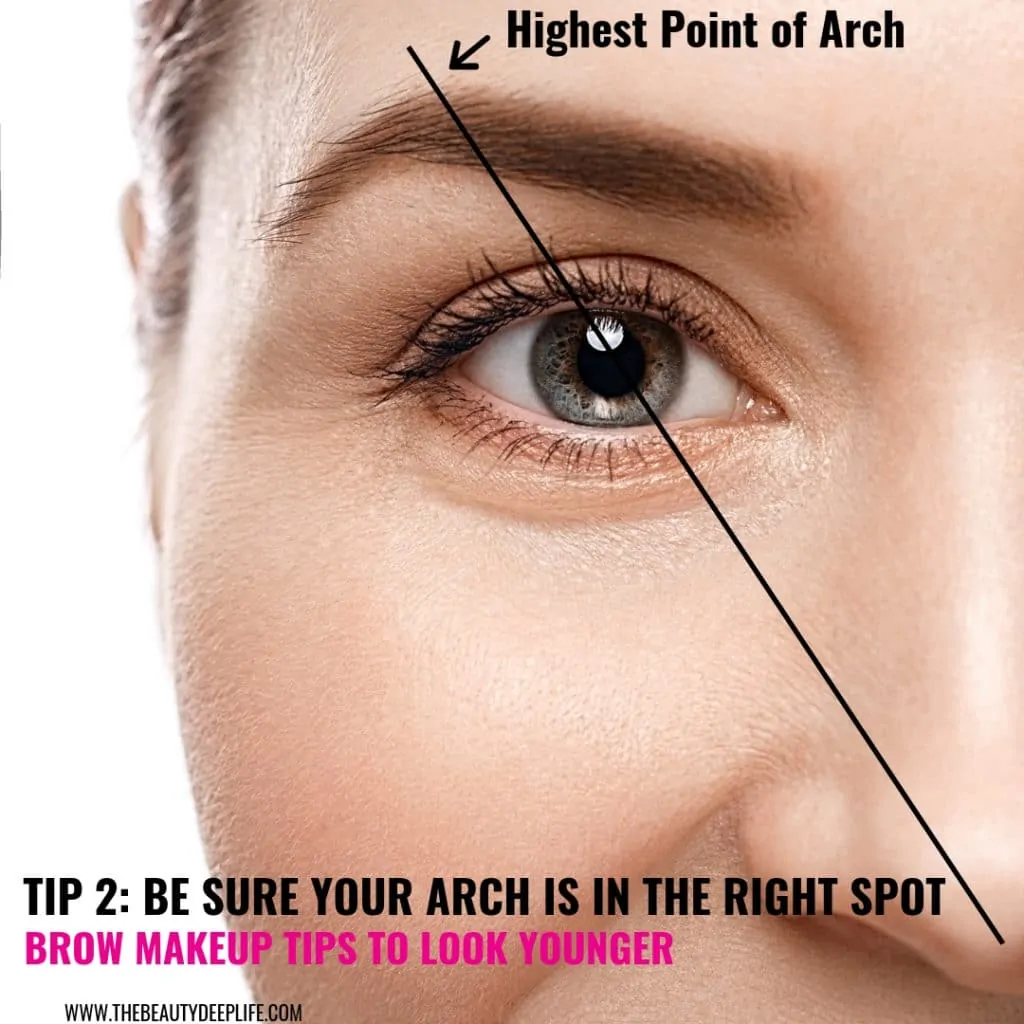
Tip 2: Be Sure Your Arch Is In The Right Spot
With an arch in its proper place, you can make everything look more lifted! Finding the perfect spot can easily be done in just a few steps.
- Grab a thin makeup brush and look in the mirror.
- Now, take the handle of the makeup brush and place it from the tip of your nose upward at a diagonal angle. Angle it so that the brush falls right over the center of your iris.
- Look for where the brush crosses your eyebrow. Generally, this is the spot where the highest part of your arch should fall. (See photo for diagram)
Pro Tip: Avoid an arch that is too sharp unless you have a round face and opt for a soft one.
Tip 3: Think Softer & Fuller
We all know that softer, fuller brows are all the rage, but they are especially important for women who want to either maintain or create a more youthful appearance.
If you are like most women, all it takes is looking back at old childhood photos before you ever picked up a set of tweezers to tell that your brows are beginning to fade as you age. And sometimes, if they become too sparse, they can start to make you look older than you really are.
So, ladies, our goal is to use makeup to give the illusion of some extra thickness while remaining natural-looking. Here are some of my preferred makeup tips and rules for filling those brows for a softer, fuller, younger look!
Rule 1: Fill Gaps & Sparse Areas First
It is important to fill in any gaps or sparse areas first if you have them. A brow pencil will give you more precision for this, but you can also try a fiber-filling brow gel, a pomade, or a powder with a thinly angled brush.
I prefer a double-sided brush like this one from Anastasia Beverly Hills. It’s an application brush and a spoolie combined. So rather than needing two tools, you have two in one!
Just keep in mind you should tread lightly with pencils and pomades, as they go on the strongest. Remember, the objective is to stay natural. Start light and build.
- Pencils: You want to let it gently move across the skin…go lightly and sort of flick it like you are drawing in individual hairs. Applying too much pressure will lead to harsher lines. So, focus on soft, quick, small strokes in the areas where you notice the gaps.
- Fiber Brow Gel: Much like mascaras that use fibers to give your lashes volume, there are brow gels that will give your eyebrows some extra fullness. When applying, sweep through the brows upward using quick, short strokes. If you are looking for a gel, this one is truly unbeatable for volume!!
- Pomades: Pomades, in particular, require the most care when applying. They can be very opaque, so it’s important to use them sparingly. Use a thin, angled brush for the best application. I LOVE using these pomades from Anastasia Beverly Hills on clients!!
- Powder: Brow powder can be a bit more forgiving than a pencil or pomade and provides the softest look, so if you are a tad unsure, start with that and a thin, angled brush. It also happens to be my product of choice for women who have very thin brows, as it gives the most natural look. I always recommend the Brow Power Duo for this. Use light strokes moving in the direction of hair growth.
For more in-depth tips for filling your brows!
Rule 2: Achieve Thicker-Looking Brows vs. Overdrawn Brows
There is a fine line between achieving a fuller-looking brow and creating an overdrawn brow. The clearest indicator of being overdrawn is if your brows end up looking a little harsh or too dark.
I always say, less is generally more….so to avoid both, start light with product application and build. Also, step back from the mirror every now and then when filling them in to make sure you are not going too heavy with the product.
PRO Tip: If brows are very thin, you can draw in a bit outside of the brow line lightly with powder and an angled brush, for more width. Just be sure not to draw in too much under the brow line, as this can make you look tired and close the eye area off.
Rule 3: Always Blend With Your Brush
After filling in your brows, always brush them out and, in particular, brush out any hard lines. You want to brush up and outward with a brow brush or spoolie. This will blend out the product, remove excess, and soften the look, making it all much more natural-looking.
A great tool for this is JAPONESQUE’s Brow & Lash Shaper! You can use the spoolie side or the side with the bristles to brush through your brows as well as for blending. And an added bonus is the lash benefiting part of this tool too.
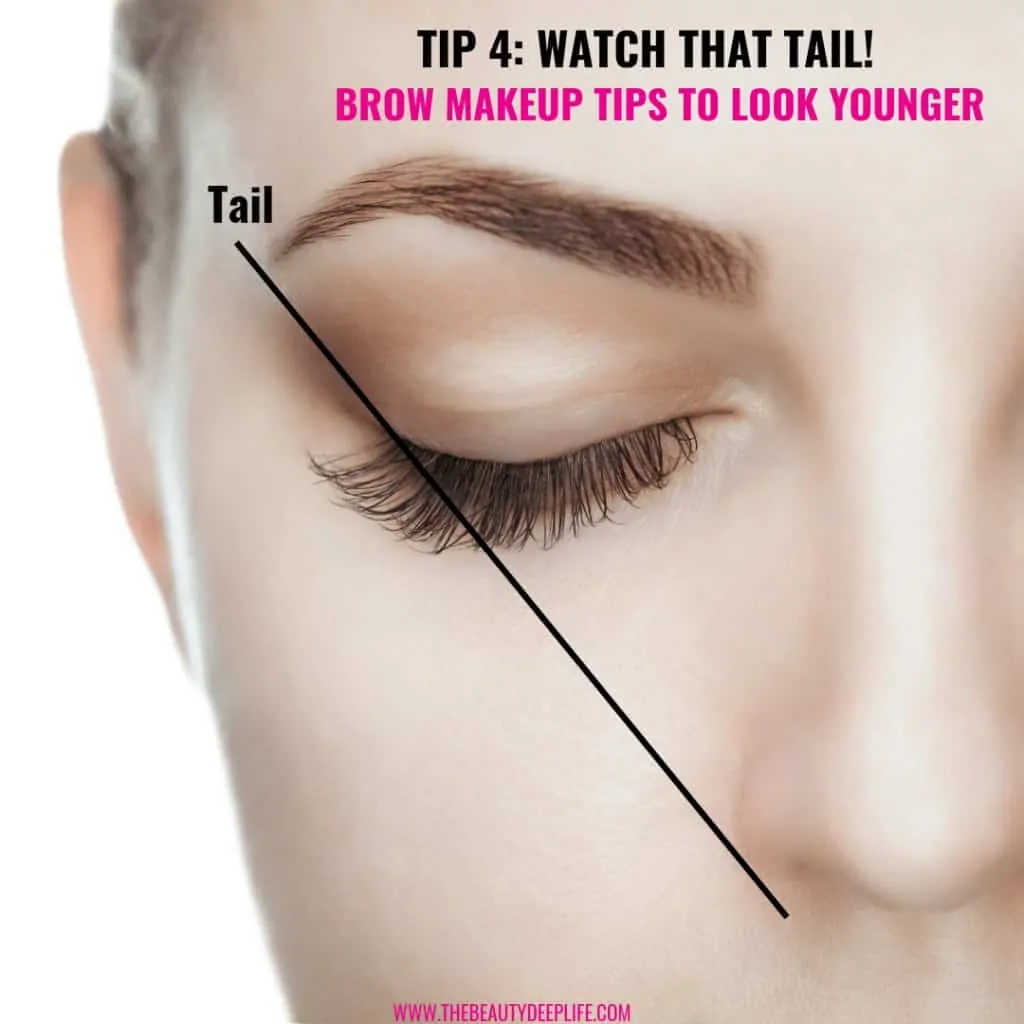
Tip 4: Watch That Tail!
For some women, the hair on the ends of their brows can thin the most and downright disappear. In this case, it’s essential to lengthen or recreate the tail of your brow. To do this, it is easiest to use a pencil or brow pomade with an angled brush.
First, determine the ideal location for your brow tail using these next steps.
- Take a thin makeup brush and place it along the side of your nostril.
- This time, angle it diagonally towards the outer edge of your eye.
- The tail of your brow should end where the brush rests. (See photo for diagram)
- Using a pencil, you will extend your brows from where they currently end to the suggested spot for the tail. To do so, you want to use short, fine, hair-like strokes going in the direction of hair growth.
- You can then either go in with powder or a tinted gel, gently over the full brow to blend and bring it all together.
PRO Tip: Focus on keeping that tail elevated! Be sure to avoid drawing and extending the tail downward. Doing so can pull the face down and make things sag, which is the opposite of youthful.
One way to avoid this mishap is to start your filling process around the middle section and end of the brow. Get the end of the brow and tail defined first, then once completed you can move back to the front of your eyebrow. From there, you can softly fill through the rest of the brow using powder and a brush, moving backward using short hairlike strokes.
Tip 5: Try Some Techniques For A Lifting Effect
- Always brush your brows upward when filling them and blending. This helps with creating some lift!
- Try using a pale or light shade of eyeshadow directly under the browbone; this creates a lifting illusion, too!
- If your brow area has started to sag, when filling your brows, try drawing your arch in slightly higher. Nothing drastic… just a subtle millimeter or so above the current line. Go in very close at the top of your brow, right near the hair roots but slightly above the brow line. Another option is to do this for the full length of the brow, not just for emphasizing the arch. Either way, you want to go above the brow line and use a clear brow gel to hold the hairs up and in place to counteract the sagging. Don’t forget to brush upward to blend.
- If just the tail has started to sag, go in slightly above the brow line for the tail portion of the brow to give it more height. Fill in with a pencil or a powder very lightly above the upper tail line. Keep it subtle!
Tip 6: Select The Right Brow Color
- For some women, using a color that is too dark for their brows can look harsh and age their appearance. Generally, you want to use a brow color that is 1 or 2 shades lighter than your hair color if you have dark hair.
- If, however, you are blonde or have very light-colored hair, you will want to try a shade or two darker.
- If your brows are a different color than your hair, you can try a color that falls somewhere in between the two colors.
- For women who have grey hairs, you can cover them with a tinted brow gel. Opt for a shade that is a bit lighter than your natural hair color (the non-grey part).
- Tinted gels can also give some fullness to your brows if you need it. For fullness, try Gimme Brow.
- If you are looking for tint as opposed to more volume, another gel option I love to use is this one from Anastasia Beverly Hills. Check out the variety of shades.
For more in-depth PRO tips for selecting brow color, check out this post!
A Helpful Anti-Aging Resource:
In terms of quick fixes, nearly every makeup product can be used to look younger; the key is knowing what to use and precisely how to use it.
So, if you’re curious about delving deeper into the power of makeup and its potential for creating a youthful appearance in minutes, the How To Look Younger Makeup Secrets guide can be an excellent resource.

This comprehensive step-by-step guide can help you navigate the world of makeup as a woman in her 40s, 50s, 60s, or up, with detailed insight into product selection and techniques to hide signs of aging and restore lost signs of youthfulness.
Click here to learn more about the How To Look Younger Makeup Secrets guide!
Disclosure: Please Note- Chapter 4 cover page of this makeup guide contains images that were AI-generated.
Makeup Tips To Look Younger Wrap-Up!
As we age, it becomes quite necessary for us to switch things up when it comes to our makeup. And starting with your eyebrows and lips is definitely the way to go, with science backing their importance when it comes to age perception! If you ever need help, please don’t hesitate to reach out to me, ladies!
I hope you enjoyed today’s makeup tips to look younger using your brows and lips! Now that you know how your eyebrows and lips can easily erase some years, what changes do you plan to make? What lip and brow makeup tricks do to swear by? Leave a comment below. I would love to hear your thoughts, ladies!
Related Makeup & Beauty Articles:
- 30 Exceptional Beauty Tips for Eyebrows!!
- For more tricks to look younger using concealer >> How To Use Concealer The Right Ways: Game-Changing Tricks & Expert Makeup Tips
- Makeup Over 40: The 15 Little-Known Mistakes That Age You
- How To Apply Eyeshadow Like A Pro
- Blush Tips and Tricks: How to Wear Blush
- Tired-Looking Eyes: 13 Fixes You’re Sure To Love!
We are a participant in the Amazon Services LLC Associates Program, an affiliate advertising program designed to provide a means for us to earn fees by linking to Amazon.com and affiliated sites. For more info, see Disclosure Policy.
I can’t remember the last time I’ve left a comment on a blog post, well over 5 years ago, but I couldn’t just save this without at least saying thank you- so, thank you! I’ve read more makeup tips, watched more anti-aging technique’s videos, etc than I could possibly remember, but I never really felt that I learned anything that applied to me. But, after reading your post I can finally say “I get it”! I get where I’ve gone wrong, I get why no other posts have ever left me feeling like I learned something… basically, as much as others will say things indicating that techniques might be different depending on factors, they never actually touch on the details. You do!!!!! And I understood every single word, you made SENSE! When I read your post, I felt one “aha” moment after another, bc you explained HOW things work. That is more helpful than I can express, at least for someone like me who needs to understand why things work the way they do, and when I do finally understand then I can apply that logic to better customize to my needs. Again, thank you so much for what I can honestly say is a gift! You have found a forgery fan in me!
Hi Meredith, You have no idea how much it means to me to hear this…Seriously, you have made me so happy just knowing that I have been able to help. I often wonder how my posts resonate with people and what they think of the content…Thank you for your very kind words! 🙂
Thanks for sharing the valuable tips. Hope this time I get my lips thin in quick time.
you are very welcome! thanks for commenting! 🙂