
While mascara may seem like a relatively simple product to apply & use, you might be surprised by the numerous factors that can influence your lash game. Everything from the pre-application prep work you do to the type of wand you use, the mascara formula you choose, to your technique can impact how it looks and, ultimately, how it wears.
Now, it goes without saying that the perks of mascara are plentiful. It’s a makeup staple that no gal should ever go without!
- It finishes off any eye makeup look perfectly.
- Mascara accentuates your eyes with a boost of flirty, femininity
- The best way to darken your lashes so they stand out & command attention
- Mascara instantly opens up the eye area (a must for small, aging, and tired-looking eyes)
- And lastly, it gives you a more youthful look by creating a lifting effect!
However, I’ve often found from speaking with my makeup clients that they aren’t maximizing their lash potential! And many who’ve been wearing mascara for years were completely unaware of the numerous mistakes and beauty faux pas they had been making for decades!
Which is why, today I’m going to spill the beans, Beauties! Today I want to share a few professional makeup tips, tricks, & hacks to ensure you apply your mascara properly & get the fab-u-lashes you absolutely deserve!!
Disclosure: This post contains affiliate links, which means I receive a small commission at no extra cost to you if you make a purchase using one of these links. This helps to keep this blog up and running. For more info, see Disclosure Policy. As an Amazon Associate, I earn from qualifying purchases.
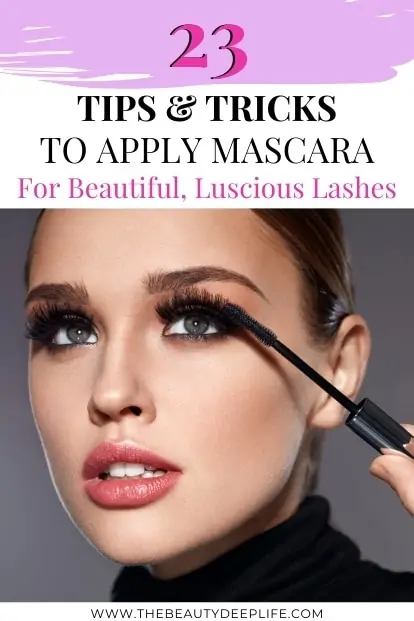
23 Tips & Tricks To Apply Mascara For Beautiful, Luscious Lashes!!
TIP 1: Apply Mascara Using The Wiggle & Roll Technique
First, to apply mascara properly, you want to start at the base of your lashes. Take the mascara wand and gently place it at the roots. Then, wiggle the brush as you roll it, moving upward through the lashes all the way to the tips.
Generally, it’s best to fan the lashes out. Here’s how…
- To create a nice doe-eyed look at the outer lashes, concentrate on moving outward and upwards in the direction of your temples.
- With your lashes that fall in the center, you want to focus on moving straight upward.
- For the inner lashes, gently brush through, going upwards and slightly inward towards the bridge of your nose.

TIP 2: Go Horizontally & Vertically!!
With mascara, typically, people will apply it by holding the wand horizontally. But another trick you should try if you want to get more precision and ensure you coat each individual lash hair is holding the wand vertically.
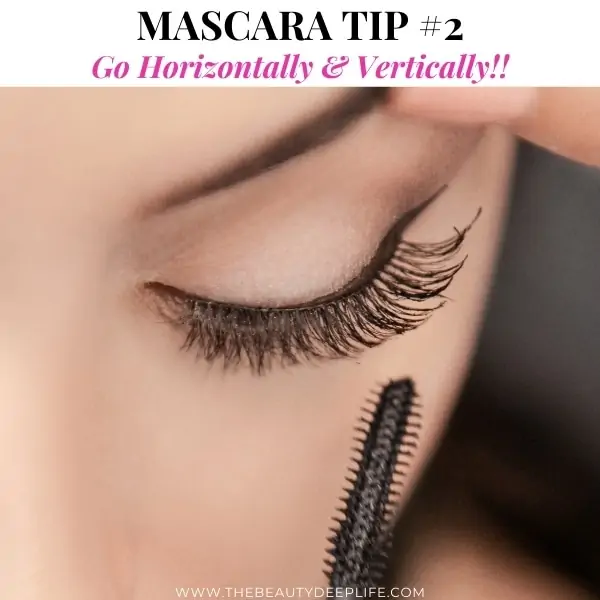
In fact, this is my favorite technique for the lower lashes. It also works particularly well if you struggle with reaching those inner shorter lashes. Using the tip of the brush, try gently moving the brush back and forth (in a sort of windshield wiper-like motion) while holding it vertically near the roots.
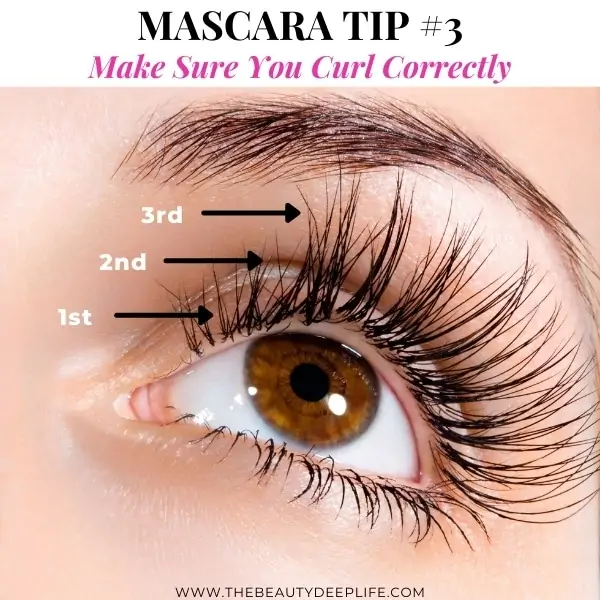
TIP 3: Make Sure You’re Curling Correctly
Not sure if you’re curling your lashes the right way? First things first, when curling, you should not clamp down and hold them in the curler super tightly. Doing so will create a weird, less-than-flattering crimp in your lashes.
I prefer gently doing a few quick pumps with my curler since mine are naturally quite curled already. However, let me break down a basic curling technique I often suggest for my clients.
With this technique, you want to focus on three different parts of your lashes, where you’ll lightly hold the curler closed for a few seconds.
- You want to start at the roots first. So, try looking downward into a mirror and gently close your lash curler right at the lash line (near the roots). Make sure all your upper lashes are in the curler and gently close it. Hold lightly for a few seconds (no more than five seconds max).
- Open it and move about halfway up your lashes (the halfway mark of the hair shaft). Again, gently close and hold for about 3 seconds.
- Open your curler and move it up close to the lash tips. This time, hold for about a second or 2. This should give you a nice, lovely, natural lift and curl!
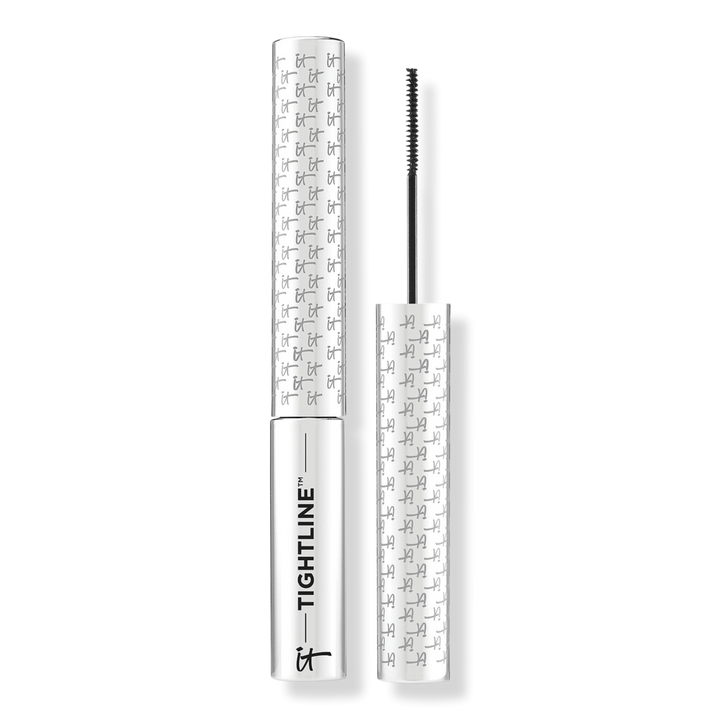
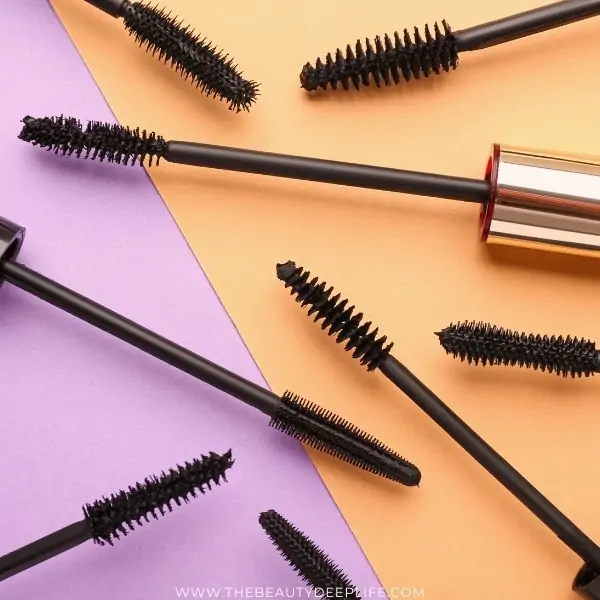
TIP 4: Consider Your Mascara Wand
In addition to the formula (keep scrolling, more on formula further down), you may also want to pay attention to the type of mascara wand you use. You see, each type can have a different effect and create vastly different looks for one’s lashes.
Types Of Mascara Wands Explained
With so many options out there, from shapes to sizes, what’s a girl to do? Well, here’s a brief breakdown of a few of the most common types of wands. It should help you have a better idea of what to get next time you’re shopping for a new mascara, Beauties!
PRO TIP: Generally, the thicker, denser, fluffier, fatter the brush, the more volume. While the finer or smaller the brush, the better it can be with precise definition and length.
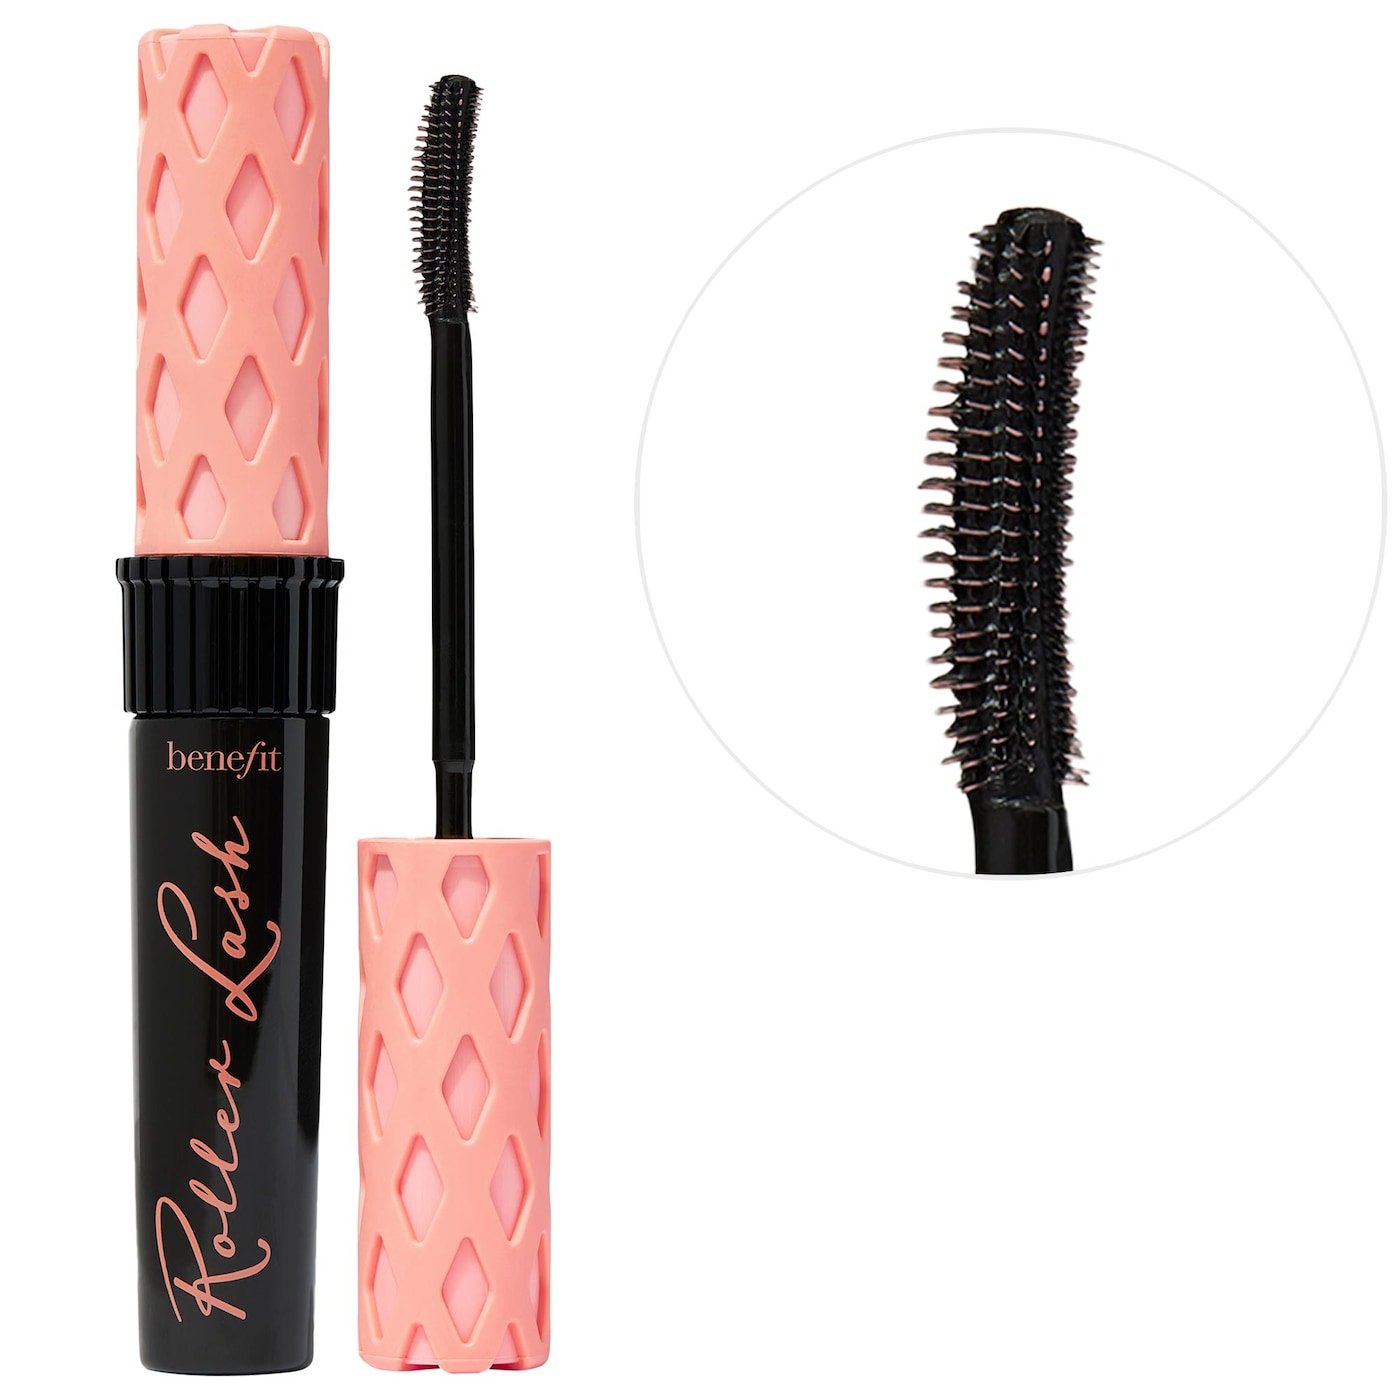
Hourglass Wand:
If you want to create a false eyelash effect, this is your new BFF! It gives extra drama, volume, length, & lift. This type makes a particularly excellent option if you have sparse lashes, as it can add volume easily to the roots. Another benefit of this type of wand is that it can evenly distribute your mascara from root to tip.
Top Pick: TOO FACED BETTER THAN SEX Volumizing Mascara

Curved Wand:
Curved mascara wands are best for gals with straight eyelashes, and they are known for their instant curling and lifting effects. I still recommend using a lash curler beforehand for longer-lasting results.
Top Picks:

Comb Wand:
Comb wands are best for separating the lashes, and depending on the formula it’s paired with, they can also lengthen and define. You can coat every single lash and usually avoid clumping with this type. They are also perfect for short lashes!
Top Picks:


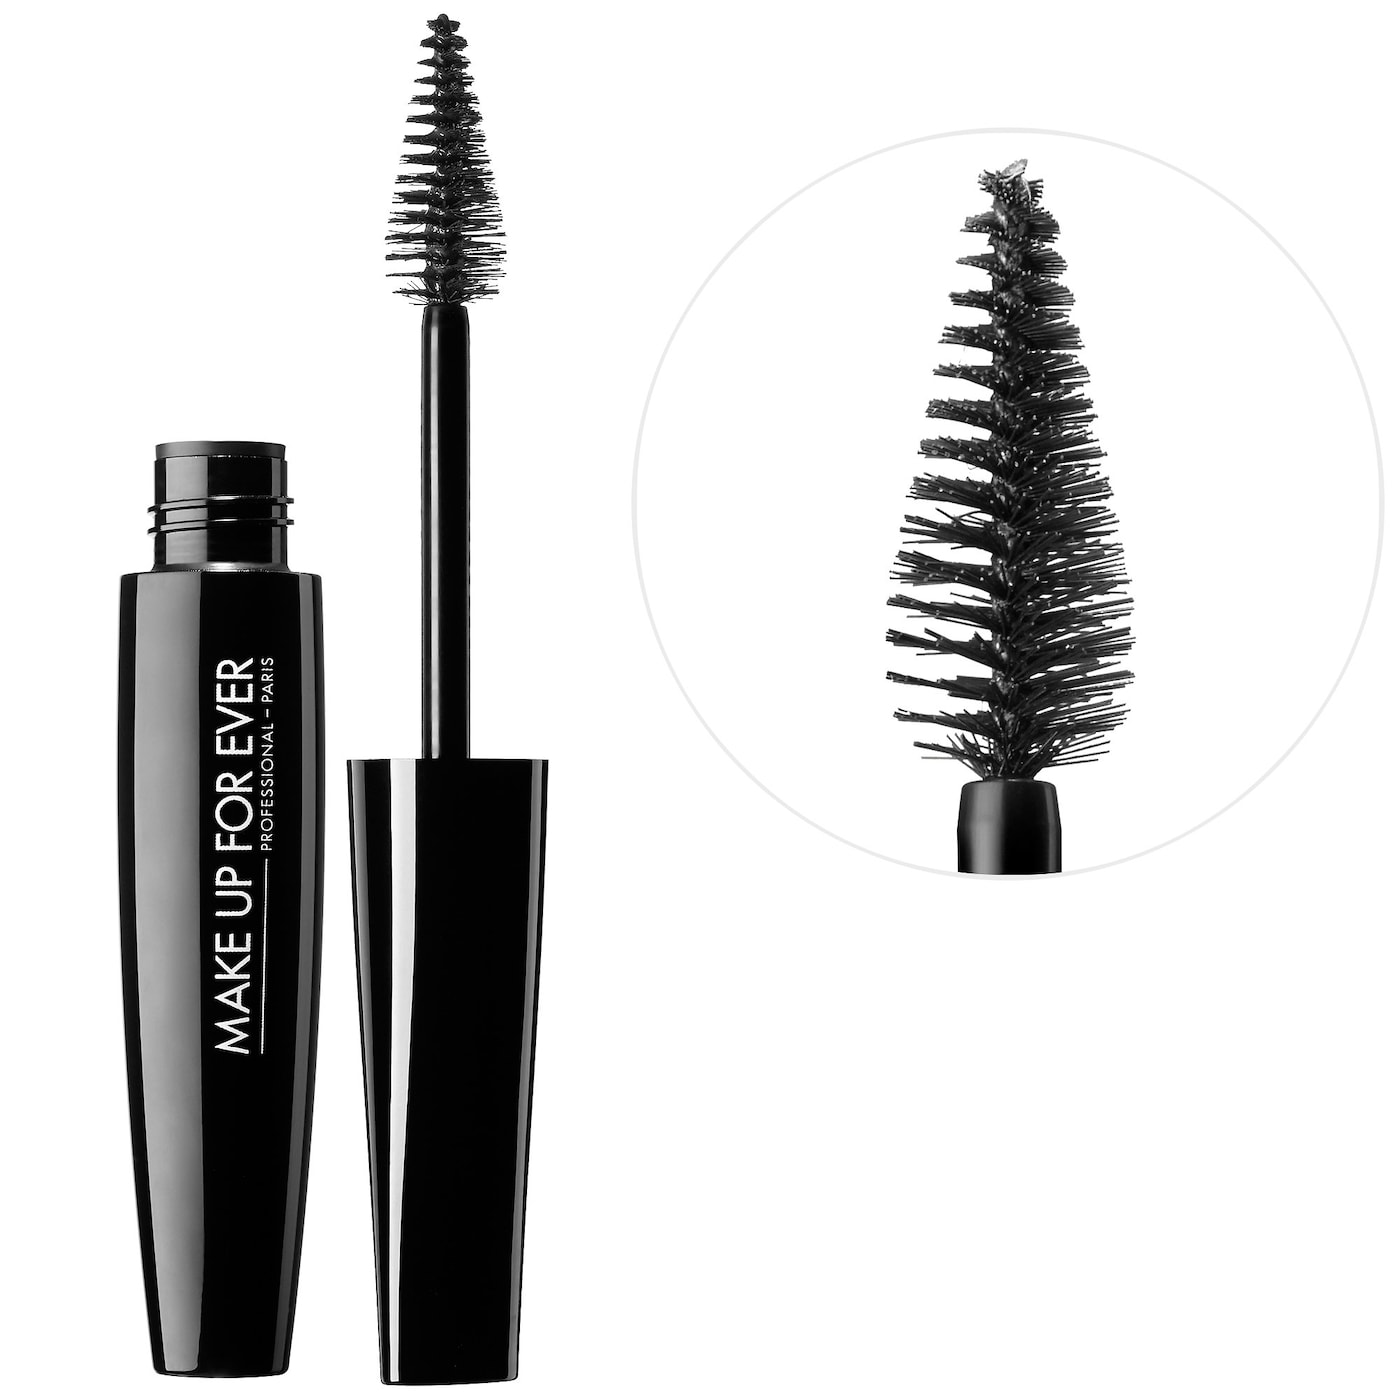
Tapered Wand:
These wands will be wider at the base and then grow thinner to a point at the tip. They are kind of similarly shaped to a pine tree or a cone in that way. The tip works particularly well for precision at the inner eyelashes. At the same time, the thicker part helps to add overall volume at the center and outer lashes. This is an excellent option for creating a fanned-out lashes look or cat-eye effect!
Top Picks:
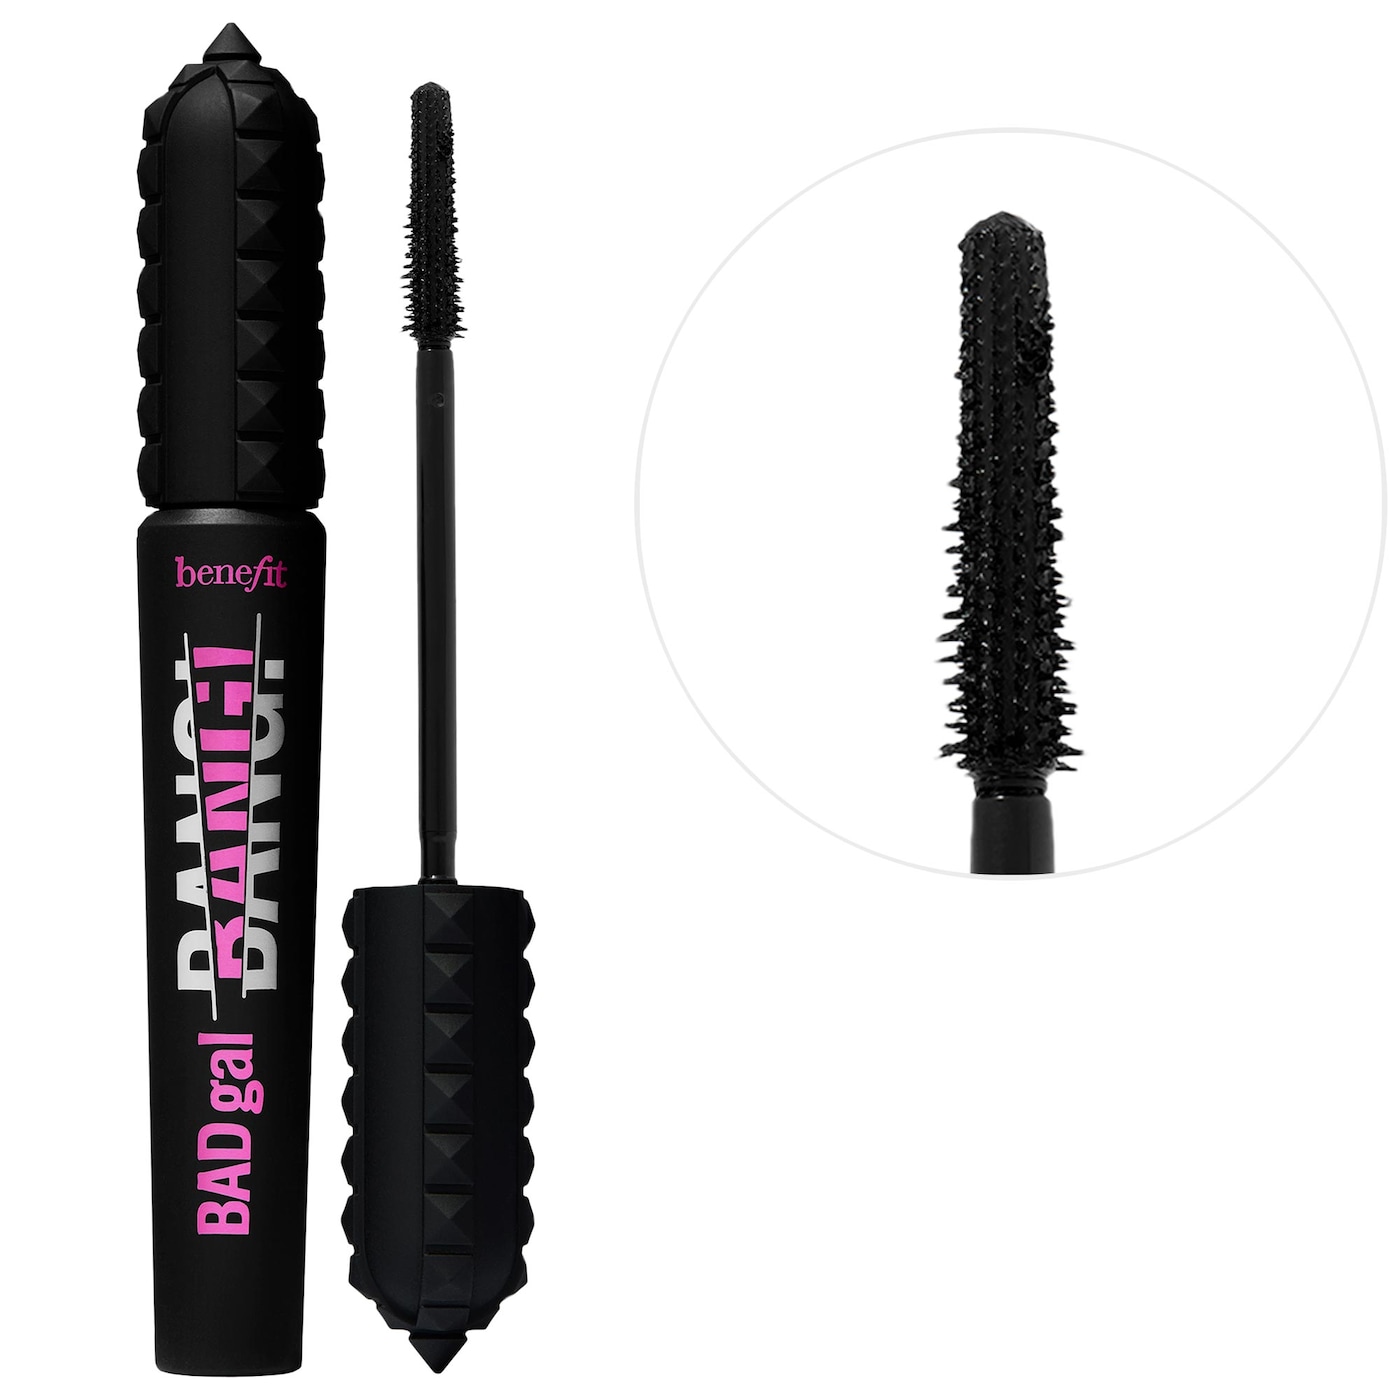
Classic Wand:
This is the traditional type you have likely seen most of your life. It’s a medium-sized bristled wand. The primary purpose of this brush is to add volume. Keep in mind the thicker its bristles, the more volume you can expect.
Top Pick: L’Oreal Paris Makeup Voluminous Original Volume Building Mascara

Ball Wand:
While this spikey shape can look somewhat kooky, it’s a superb option for definition and precision in those hard-to-reach areas. For gals with short lashes, you can add length evenly from the root to the tips! You can also use this type of wand to build up your outer lashes if you want to create a more elongated eye shape. And much like a comb, this type allows you to get to each individual lash no matter where it’s located.
Top Pick: Givenchy Phenomen Eyes Mascara
Balled Or Domed-Tipped Wand:
This type is what you get when you combine a classic wand with a ball-shaped wand. The balled or dome-shaped tip assists with achieving precise application at the inner corner lashes. While the rest of the wand works to cover all your other lashes with perfection!
Top Picks:

Skinny Wand:
Another top pick for gals with lashes on the shorter side would be skinny wands. This type can easily reach the roots of your lashes while lengthening, defining, & separating. Also, an excellent pick for lower lashes!
Top Picks:

Oversized/Dense/Fat & Fluffy Wand:
These brushes are best for getting mega volume. The bristle will pick up a lot of product, so with some brands, generally, you can get away with fewer strokes (one coat even)! However, this can sometimes be a hard one to maneuver if you have short lashes.
Top Picks:


TIP 5: Pick A Formula Based On Your Needs Or Goals
Mascaras are formulated to provide a key benefit (sometimes more than one). Luckily, most brands will list what theirs may be on the packaging. So, when it comes to picking the right formula, rather than worrying about ingredients, all you need to do is figure out what your lashes need or how you want them to ultimately look.
Do you need more volume? Perhaps, could your lashes use more curl? Or maybe you want to add some serious length?
There are a few general categories and keywords to look for when shopping around…

- Lengthening: If your lashes are short or stubby, this type of mascara will extend their length, as it will contain synthetic fibers like nylon & rayon or natural fiber alternatives that bind to the lashes adding on to their tips. Alternatively, some will have polymer blends that wrap around each lash hair and extend it beyond its natural length.
- Volumizing: Voluming mascaras will give you that VA-VA-VA-Voom thickness for fuller-looking lashes. As far as ingredients, they usually contain those that will plump up the lashes, like silicone polymers & waxes, along with pigments that give a darker, fuller appearance. If you have sparse or fine lashes, give this formula a go for sure! If you don’t, this type also makes a great option if you want to go for a lush, seductive look. This happens to be my favorite type for just that reason.
- Curling: If you have flat or falling lashes, curling mascaras will give them a nice, lifted boost. They usually contain polymers (film formers) that contract which causes the hair to curl and lift.
- Defining: These mascaras are your multitasking worker bees in the mix! They usually give you volume, thickness, and length together all in one! Most times, they have a combination of polymers and strong pigments for powerful color! They separate each lash and define with perfection from the root to the tip!
- Non-clumping: These are fairly new to the game! They use silk and glycerin extracts to keep lashes neat without the clump factor!
- Waterproof: A waterproof mascara stands the test of time, rain, and sweaty summers! They won’t smudge on you and are long-lasting!
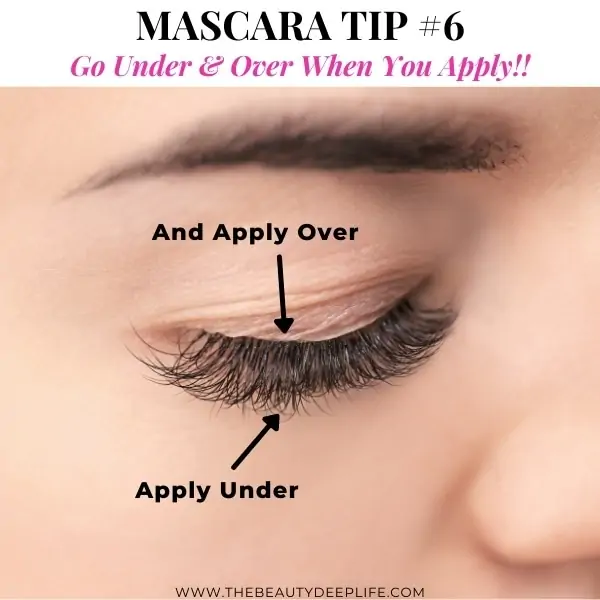
TIP 6: Go Over & Under!!
Most people will only coat the bottom side of their upper lashes when they apply mascara. But to get the most out of your mascara, whether it’s for more thickness, darkness, or length, in addition to applying from underneath your lashes, try coating the top of them as well.
- Take your brush (this works better with a smaller wand brush) and gently place it horizontally along the lash line.
- Then, brush slowly, moving downwards along the lashes, going from root to tips (in the direction of your cheek).
TIP 7: Let Dry & Grab A Spoolie For Mishaps
Do you ever have makeup mishaps and get excess mascara on your skin? If this happens, just let it sit and dry thoroughly before attempting to clean it off. Once it’s fully dry, you can go back and gently use a clean spoolie to remove it. Lightly brush the spoolie over it, and it should flake off easily. Of course, you can always try a pointed Q-tip with a bit of make remover, but the spoolie method often works better.
WAIT…BEFORE YOU KEEP SCROLLING…
Do You Want To Become A PRO At Eyeshadow & Skyrocket Your Eye Makeup Skills?
EYE MAKEUP MADE EASY!!!! Take Your Makeup Skills To The Next Level With The Essential Master Your Eyeshadow Guide!! 75+ Pages Packed with Exclusive Professional Makeup Tips, Tricks, & More!!
- 14 Stunning Step-By-Step Eyeshadow Looks & Techniques!
- Eye Makeup Cheat Sheets & Charts!
- Learn How To Correctly Use Eye Makeup Brushes, Combine Eyeshadows, Pick Your Best Colors, Apply False Lashes, + Several Additional Bonus Tutorials!
- Perfect for Beginners & Up!
- INSTANT Convenient Access From Computer, Tablet, or Phone!
TIP 8: Twirl, Don’t Pump
Instead of pumping your mascara before application, try taking the wand and twirling it around the inside of the tube. This method helps to stop air and bacteria from entering. When air enters, it, unfortunately, tends to dry your mascara out rather quickly.
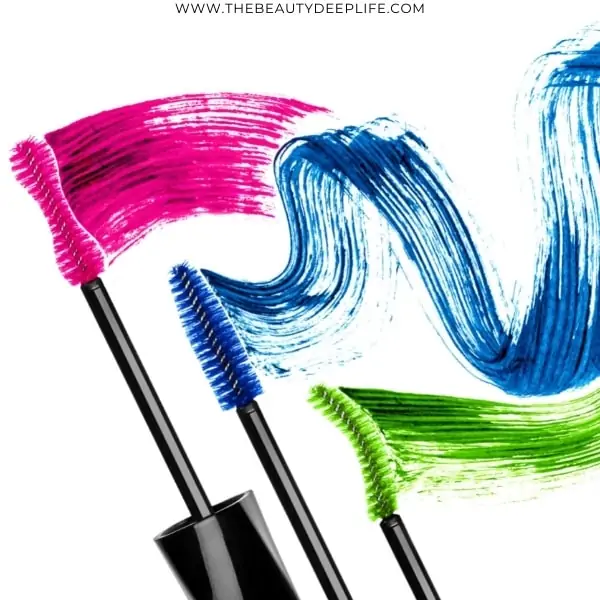
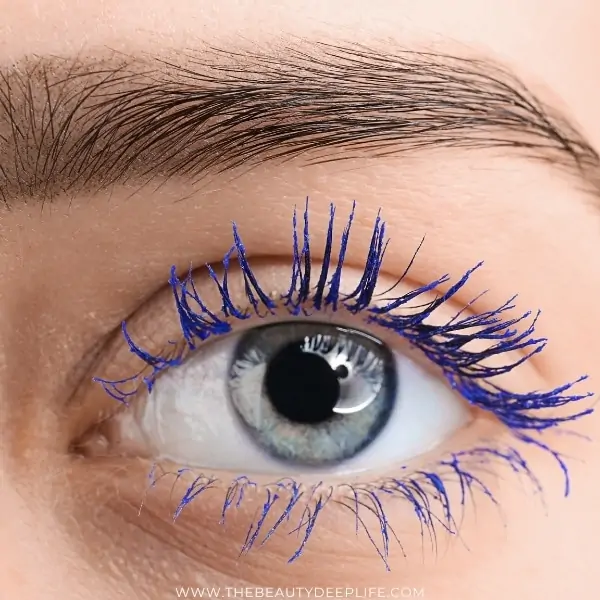
TIP 9: Play Around With Different Shades
Generally, the color of choice for mascara is good ol’ jet black as it gives the most dramatic effect with the boldest depth & dimension. However, if you have a very fair complexion, have light lash hairs (red or blonde), or simply want to go for a “no-makeup,” subtle & natural look, try a brown or black/brown.
Now, if you want to get more colorful, you can use your mascara to make your eyes pop and enhance their color. Here are a few gorgeous picks based on your eye color…
- Green Eyes: Purple or burgundy
- Brown Eyes: Blue, green, or purple (violet).
- Hazel Eyes: Green, purple, burgundy, or gold
- Blue Eyes: Burgundy, pink, or purple (bright violet).
PRO TIP: Trouble getting your colored mascara to show up on your lashes? Try using a white primer like this one before you apply your colored mascara.
Best Colored Mascaras:
Blues
Purples
- L’Oreal Paris Makeup Voluminous Original Volume Building Mascara, Deep Violet
- Lime Crime Astronomical Mascara, Nebula – Light Lavender
Burgundy
L’Oreal Paris Makeup Voluminous Original Volume Building Mascara, Deep Burgundy
Greens
- L’Oreal Paris Makeup Voluminous Original Washable Bold Eye Mascara, Deep Green
- Fenty Beauty Full Frontal Volume, Lift & Curl Mascara – Ivy League
Pink
Ciaté London X Smiley World Keep An Eye On Mascara! Be Brave
TIP 10: Take A DIY Colorful Approach
Don’t have a colorful mascara? You can always try mixing a bright, loose eyeshadow pigment with clear mascara. Here’s How…
- Take a clear mascara and wipe the wand on a makeup palette, depositing a little of the product.
- Next, add some loose pigmented eyeshadow to the palette as well.
- Mix them together using a makeup spatula.
- Once thoroughly mixed, grab a clean spoolie brush.
- Now swipe the spoolie into the mixture and apply it to your lashes as you normally would.
TIP 11: Don’t Use After Expiration
Mascara, depending on the brand, after opening, can last from 3-6 months. After that time, make sure to toss it! You see, using old mascara is a total recipe for an eye infection from yucky bacteria growth! Additionally, once mascara gets too old, it becomes very dry and eventually won’t apply quite as well.
PRO TIP: If you notice an odd odor, toss it pronto!!
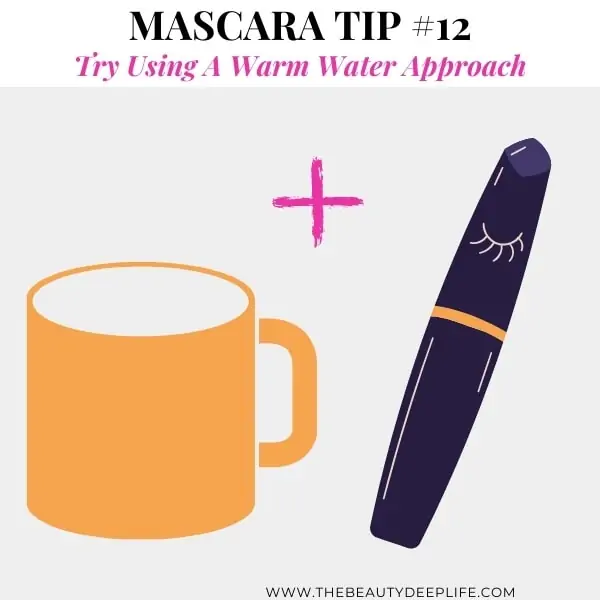
TIP 12: Try Using A Warm Water Approach
With time, mascara tends to dry out & clump up. If this happens, assuming it’s not past its expiration date, try using a cup of warm water to soften it up again.
- Fill a cup with warm water and place your mascara tube inside the cup.
- Let it sit for a few minutes while you apply your other makeup.
- Then, take it out, twist it off, & open it. You should see a definite improvement!
- *If you notice this and it’s past its expiration date, toss instead.
TIP 13: Apply Mascara Towards The End Of Your Full Makeup Routine
Often, after applying eyeshadow or powder products to the face, the powder can fall upon the lashes and sit or settle there. If you’ve already used your mascara, you will end up having to apply it again to cover the fallout on your lashes. So, to save yourself the drama of all that, it’s better to get the powder makeup over with before reaching for your mascara.
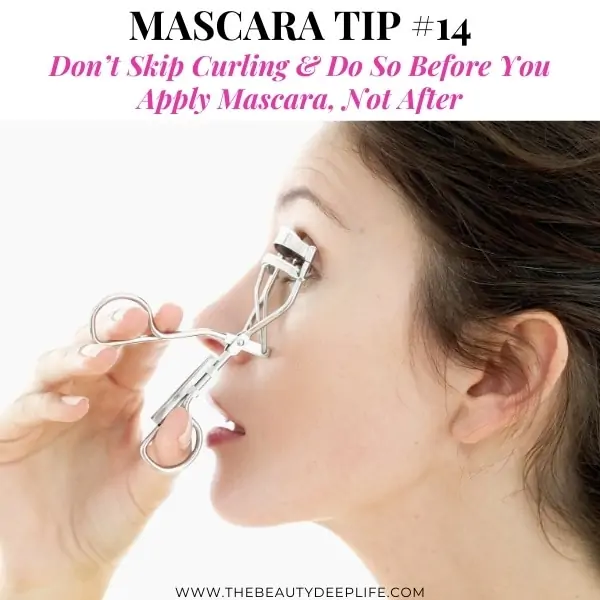
TIP 14: Don’t Skip Curling & Do So Before You Apply Mascara, Not After
While the importance of curling one’s lashes may seem like something every gal already knows, you might be surprised by how many actually skip this step. Or even worse, wait until after using mascara to curl their lashes.
Curling your lashes gives your eyes a beautiful lift, opens your eye area up, and makes the eyes appear more awake. These are all absolute musts, particularly if you happen to be a woman over 40 years of age, which is why it’s one of the strategies I teach toward looking more youthful in my newest makeup guide. You see, with age, our eyes can start to look tired. As we lose skin elasticity, they begin to look more droopy, and our eyelids appear heavier, which makes them appear smaller.
Curling the lashes also helps with lengthening and making them appear fuller, thereby maximizing your lash potential before you even get to the benefits of your mascara. So it’s a step that certainly deserves a spot in your makeup routine and should be done prior to applying your mascara.
In comparison, opting to curl after one’s mascara application can give you an unflattering crimp and wonky bend to your lashes. You don’t want that, right??
TIP 15: Start Light & Thin
You should attempt to apply your mascara in thin coats or layers. This way, you can start light and build up as needed, which helps prevent clumping. However, to avoid applying too many coats, which can often lead to flaking, you may want to try to stick to about three to four coats max.
TIP 16: Wipe Your Mascara Wand Before You Apply
Tired of annoying mascara clumps? Here’s a trick to easily make that clump factor a thing of your past… Before you apply mascara, wipe off the excess from the wand onto a paper towel. Then, you can proceed to use it as you normally would.
PRO TIP: No paper towel? You could also try wiping it against the inner edge (the lip) at the opening of the mascara tube.
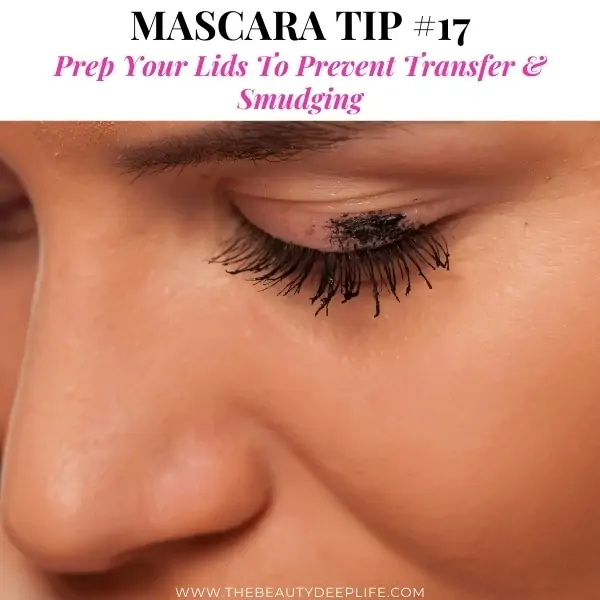
TIP 17: Prep Your Lids To Prevent Transfer & Smudging
If you happen to have oily eyelids, you’ve probably struggled with mascara smudges appearing on your lids after a few hours. The best way to prevent this is to either use an eye makeup primer or apply a concealer and set it with powder at the beginning of your eye makeup application process. Then, leave the mascara application for last after using your eyeshadow and liner.
TIP 18: Strategically Use Mascara To Freshen Up Tired Eyes!
Do you struggle with tired-looking eyes? A quick and easy way to brighten things up is to try bringing out the whites of your eyes with your mascara. How do you do that? Simple, use dark navy blue mascara on your lashes, and you’ll see improvement in a jiffy!
Related: Tired-Looking Eyes: 13 Fixes You’re Sure To Love!
TIP 19: Use More Than One Mascara For Multiple Goals Or Needs
Do you have more than one lash need or goal? While there are some, not every mascara is capable of doing it all. So rather than trying to find one mascara that adds volume, length & curls, use more than one and try a layering approach. You can try a lengthening mascara, let it dry, and then add a volumizing mascara on top.
You should also play around with using a different mascara for your lower lashes than you use on your upper lashes. Why??
Well, first, you may find that waterproof mascara is better for your lower lashes. Secondly, the mascara you use on your upper lashes can often be too heavy for the lower ones. And third, some wands are easier to use and less messy when applied to the lower lash line. For example, since the lower lashes tend to be shorter, a small wand is usually better.
TIP 20: For Extra Oomph, Try Prepping With A Primer
If you want even more volume or length, you should consider trying a lash primer. You want to apply the primer and let it dry completely before using your mascara.
Generally, to avoid a clumping effect, you should focus your application on going from around the middle of the hair shaft to the tips instead of applying at the roots.
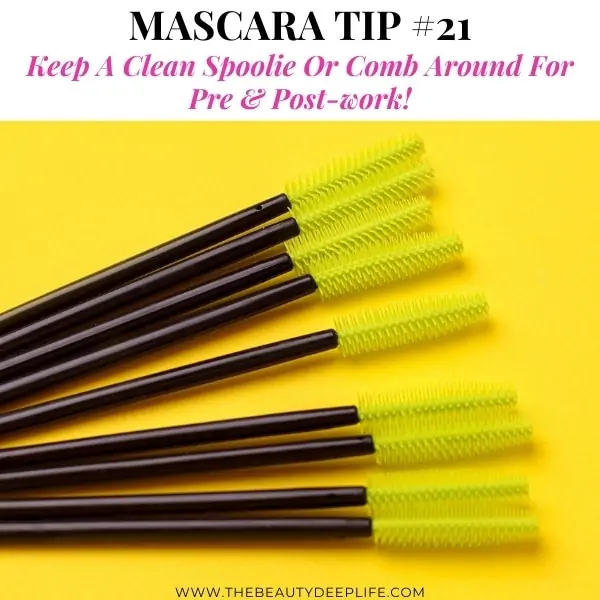
TIP 21: Keep A Clean Spoolie & Comb Around For Pre And Post-work!
- Before applying your mascara, try lightly brushing a clean spoolie through your lashes if they are a bit unruly. This will help prep them for the lash curler.
- You also most definitely need to use a clean spoolie or lash comb after applying your mascara if you are prone to clumping. This will keep you from getting scary-looking spidery lashes! Make sure to comb through while your lashes are still wet (before they’ve dried completely).
TIP 22: Bring The Heat For Curl Power!!
For a longer-lasting, stronger curl to your lashes, you can always opt for a heated lash curler. I have always found these particularly helpful on my own lashes after I’ve had major growth from using a lash-enhancing serum.
Naturally, my lashes are a little curly, but after using serums to make them grow, I’ve often found they become a little straighter. And due to them being much longer, they also don’t quite curl uniformly anymore. So, a heated lash curler truly helps to get them all lifted and going in the right direction for sure! It also helps the curl last like crazy!!
TIP 23: Want A Next Level Lashes Look? Include Your Lower Lashes!!
While applying mascara to the lower lashes is not a necessity, it can certainly enhance a makeup look. For the lower lashes, if you are prone to smudging or have particularly long lashes, opt for waterproof mascara. As I mentioned in Tip #2, you can apply it with a small wand, holding the wand vertically.
But if you prefer a horizontal method for application, another option is to use mascara that comes with a comb wand. This helps to separate the lower lashes and prevent any clumping there. It also creates a much more defined lower lash look that I adore!!
PRO TIP: Worried about hitting the skin with your wand & winding up with a mess? Try holding a folded piece of tissue directly under your lower lashes when you apply your mascara there.
The Mascara Wrap-Up:
Well, Beauties, that sums up the top tips, tricks, and hacks for mascara. If you are looking to apply like a PRO, these 23 will have you covered indeed!! How do you usually apply your mascara? Were any of these makeup tips new to you? Leave a comment below; we want to hear from you! 🙂
Related Articles:
- Basic Makeup Tips And Tricks: 30 Absolute Need-To-Knows For Beginners
- Beginner Makeup For The Everyday Woman
- How To Apply Eyeshadow Like A Pro
- Tired-Looking Eyes: 13 Fixes You’re Sure To Love!
- Eyeliners For Blue Eyes: 15 Eye-Catching Must-Haves
- Best Eyeshadow Palettes For Brown Eyes + Eye-Popping Single Shades
We are a participant in the Amazon Services LLC Associates Program, an affiliate advertising program designed to provide a means for us to earn fees by linking to Amazon.com and affiliated sites. For more info, see Disclosure Policy.
Thanks so much for impacting us with your knowledge and time you spend to do research we appreciate.